Once you have downloaded and installed the TAI extension in your Chrome browser, you can use it to directly add data (via web URLs) to your chatbot knowledgebase, without having the need to use the TAI admin. This extension is linked to you TAI account and would only work once you have logged in; users who do not have an active TAI account will not be able to use it.
All about the TAI chrome extension
Clicking on the TAI extension on your Chrome browser will prompt you to login to your TAI account; clicking on the Login button would direct you to the TAI admin login screen. Enter your credentials on the screen and click login. Once you have logged into the TAI admin again click on the TAI extension in your browser, you would be logged and taken to the Home screen(as shown in screenshot 2) within the extension.
The Home screen displays all data that is available within your chatbot knowledgebase instance. In case you have multiple instances available in your TAI account, all instances will be listed on the screen, with the first instance showing up as selected. Data will always get added to the knowledgebase of the currently selected instance. Click on another instance name to view/add data to its knowledge base. Do note that instances can be only be added/managed via the TAI admin interface.


The Chrome extension allow you to:
1. Extract data from webpage URLs and add it to the currently selected chatbot knowledgebase
2. View and search through all data available in the knowledgebases of various Instances
3. Directly go to specific screens within the TAI admin
1. Extract data from webpage URLs and add it to the current chatbot knowledgebase
The + Add URL to Instance feature can be used to add the current URL (i.e. the URL that is currently open on your browser tab) and have its data extracted and saved to the knowledge base of the currently selected instance.
To add a URL, on your Chrome browser tab open the webpage whose data you wish to add; now open the TAI extension and click on the + Add URL to Instance button.
You will be prompted to confirm the action before the data is extracted. A popup, as shown in the screenshot below, will open.

You can type in additional notes about the webpage or use the microphone icon ( ) to speak and have your speech transcribed to text and added to the Additional Notes field. To use voice, click on the microphone icon. You may be prompted to give permissions to use your device microphone (if not given earlier) and once this permission has been granted the audio would start.

While recording the microphone icon will change to a stop icon ( ) and a 3 minute countdown timer (
 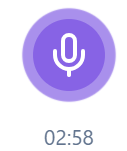 ) will be displayed below the field. You can start speaking and when done, click on the stop icon. Your speech will be transcribed and added to the field. Do note that you have a 3 minute limit for a recording. Once you have exhausted the limit you can use the microphone icon to speak again and have your newly transcribed text appended to the current text. Use the Clear button to remove the text.

Once the relevant additional notes have been added, click the Submit button. The data from the webpage will be extracted and saved to the knowledgebase. The additional notes (if entered) will be added as Text meta data to the extracted content. Once the data has been added, the Home screen will be refreshed and the newly added data will be shown at the top of the list.

Do note that a web page URL can only be added once to the knowledgebase. You can use the refresh icon ( ) available against it to have the data (from the same webpage URL) extracted and saved again.
You have the option to Edit or Delete data from the knowledgebase. To do so, click on the three dots icon (  ) available against a data block and from the menu that appears - click Delete to delete the data block and click on Edit to edit data. Clicking on the Edit icon will direct you to a screen within the TAI admin interface wherein you can make the required edits and save it.
View and search through all data available in the knowledgebases of various Instances
All instances that are available in your account will be listed. Click on an instance name to have its knowledge base displayed. You can use the search bar ( ) to type in a keyword and search for data items within the knowledgebase. You can also use the Next and Previous buttons to navigate the data list.
Directly go to specific screens within the TAI admin
The TAI chrome extension also provides shortcuts to other screens within the TAI Admin interface. Clicking on the Dashboard icon will take you to the TAI admin dashboard screen. Clicking in the Chat icon will open the chatbot (for the currently selected instance) in a new tab.
Logging out of the TAI Chrome extension
Click on the Account icon from the bottom navigation menu will open a screen wherein you can click the Logout button to logout of the application.
You Can Also Read About: