Each location/event/entity will have a public facing brand page that aggregates all reviews and generates an overall rating based on the responses received.
A brand page is automatically created for your main location when you sign-up. Similarly, whenever you add a new location, a brand page is automatically created for it.
You can view the brand page using the Build-> New Locations/Events/Entities menu. You will be directed to the screen wherein all business locations that are available for your account will be listed.

To view the business page, click on the brand name or the little 
 icon available next to the business or location name. This opens the business page in a new tab of your browser. You can also open up the brand page via the Market Reviews -> Edit Brand page link (do note that in case you have multiple brands/locations setup then Edit brand page menu will direct you to the default brand i.e. the brand that you had mentioned at the time of signing up).

Adding a new brand
You can add a new brand by clicking on the + Add Entity button. The Add Brand form will open in a popup, fill out the requisite details and click on Save to add the brand.

3. Website URL (optional): You can enter URL to your website here.
4. Domain (optional): The business domain can be entered here. The domain would be what was used in your work email id.
5. Tagline (optional): In case your brand/business has a tag line you can add it here.
6. Category (mandatory): From the list provided you can select the category or segment that your business falls under.
7. Business Phone Number(optional): This is the phone number that will be displayed on your brand page.
8. Description (optional): You can enter a brief description about your business/brand here. A maximum of 400 characters can be entered as the description.
9. Opening Hours (mandatory): Click on the opening hours field to choose the days of the week that your business operates on. You can also select the opening and closing time for your business.
10. Country (mandatory): Choose the country where your business is location. The state field will show options based on the country selected.
11. Address Line 1 (mandatory): Enter the address of your business.
12. Address Line 2 (optional): Additional address details can be provided here.
13. City (mandatory): Enter the city your business is located in.
14. State (mandatory): Select the state from the list provided.
15. Zip/Post Code (mandatory): enter the zip code here.
16. Chatbot Visibility (optional): Check this option to enable the chatbot on your brand page.
17. Sub User (mandatory): Enter the email id, name, a password and phone number of the person who will be responsible for managing this location.
18. Coupon Code (optional): Not in use at the moment.
19. Choose Questionnaire Template (mandatory): A questionnaire template contains the questions that will be displayed on the Feedback/Survey page for your brand. All survey/questionnaires that are available for your account will be shown here. You can select the survey that is to be associated with the brand/location.
20. Feedback URL: This is the link to the feedback/survey page for the brand. This is auto-generated.
21. Message shown on Thank you Kiosks (optional):Not in use at the moment.
Managing Brand Details
All the brands/events/locations/entities that are available for your account will be listed under the Build -> Locations menu.

Each block in the listing represents details of a brand, and include options to:
1. View the brand page: Click on the brand name or on the icon  available next to it. The brand page will open in a new tab.
2. Edit the brand details: Click on the Edit icon, the details of the brand will be shown in a popup. Make the necessary changes and click on the Save changes button for the changes to take effect.
3. View the Feedback/Survey page for the brand: Click on the public feedback link text box or the icon available next to it. The feedback page will open in a new tab. You can also copy the URL by clicking on the copy icon  .
.

Brand Page Visibility
By default, business page is visible publicly. It gets indexed by search engines and appears on search results. To hide the business page, go to the Settings-> Privacy menu option.
If you have only one location setup for your brand, then you are directly taken to the Privacy screen. If you have more than one location/store/entity/event setup, you will be prompted to choose the location for which you want to change the settings.

Choosing the location takes you to the Privacy screen for the selected location.
Under the section 'Privacy Settings', there is a toggle button for 'Make brand page visible publicly'. By default, the toggle button is 'On' as the business page is available to the public. You can use the toggle button to hide the business page.

Now click the 'Save Changes' button at the bottom of the screen to save the settings.
Review Visibility on Brand Page
Under the section 'Privacy Settings', there is a toggle button for 'Make reviews visible on brand page'. By default, the toggle button is 'On'. You can slide the toggle button to 'Off' to hide there views from appearing on the business page.

Click the 'Save Changes' button at the bottom of the screen to save the settings.
Setting Cover Photo for Brand Page
The business page has the provision to display a cover photo besides the brand logo. To upload a new cover photo or to change an existing one, go to Market Reviews -> Edit Brand Page menu option, the brand page will open in edit mode in a new tab. There will be a blank placeholder for cover photo above your brand logo. When you hover the mouse over that blank screen a camera  icon appears. Click the icon to upload an image for the cover photo.

Clicking the icon opens a popup that allows you to browse and upload an image. Click the 'Browse Picture' button. Note the image should be at least of the dimension 1200 x 550 pixels.

You can re-adjust the picture for cropping and click the button 'Crop& Save' to add cover photo on your business page.
Setting Logo for Brand Page
The business page has the provision to display the brand logo. The brand logo can be updated from two places:
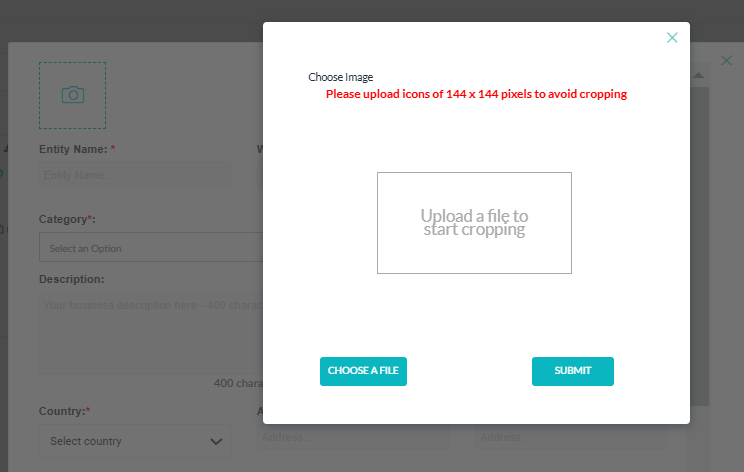
1. Edit Location screen: Go to Build -> Locations menu option, from the listing, click on the Edit link available for the brand whose logo you want to change. A popup with the details of the selected brand will appear. Click on the logo placeholder/logo you will get the option to upload an image.
2. Brand Page: To upload a new logo or to change an existing one, go to Build -> Locations menu option, from the listing, click on the brand name whose logo you want to change. The brand page will open. When you hover the mouse over the logo placeholder an Edit icon appears. Click the icon to upload an image for the logo\.
You Can Also Read
Setting up survey questionnaires